I am sure many of you are experts in the world of LEGO; I’m a newbie. I married a guy who is nutty about LEGO and who eagerly awaited the time when his children found LEGO enthralling. Well, that time has come. I am now surrounded by 3 boys (the big one and 2 little ones) who can’t get enough of the colourful locking blocks.
I’m eager to support the LEGO-craziness as long as I’m not walking on the wretched pieces. I’ll freely admit it: I’m a neat freak and toy clutter may be my un-doing. I need order and a system and a big ol’ tub of a bazillion random LEGO pieces just isn’t going to cut it. Truly, that is where we started from – a huge plastic tub filled with my husband’s 30+ year old LEGO he lovingly saved for his future children.
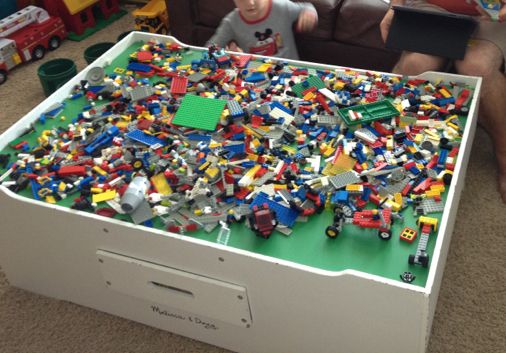
After this picture was taken we learned that cleaning up a million LEGO pieces on a regular basis was ridiculous! Whenever it was time for LEGO we covered up our train table with the sheet, poured out the LEGO, hours of play ensued, and clean up was achieved by closing up the sheet and plopping the whole thing back in the ugly storage tub.
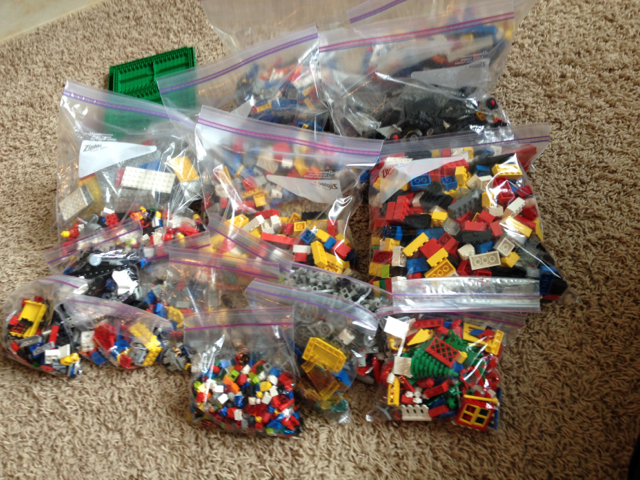
This system worked well for a number of months. However, as the passion for LEGO increased the number of LEGO pieces exponentially grew. Over the Easter long weekend, my husband and I decided we needed to sort the boys’ LEGO pieces. We were both tired of hunting through the enormous pile to locate a tiny visor or tail light. Three LONG hours later, we had everything organized into Ziploc bags. While the neat-freak-in-me was as pleased as punch, the mother-in-me realized I may be stifling my children’s creativity.
So, I hopped on the ever-useful Google searching for LEGO storage solutions. Wowzers, are there ever a ton out there! It quickly became apparent there are three types of LEGO storage solutions:
1) LEGO fanatics who have enough storage to sort by BOTH colour and shape. While I applaud their organization, I have a 3 & 5 year old and there is no way the kids will be capable of maintaining a complex organization system. Also, let’s be honest, I’m not decorating our family room with multiple cabinets full of little drawers.
2) LEGO newbies who don’t have much LEGO and can contemplate the yellow LEGO-head-shaped size sorter. FYI – I’ve never tried the shaking-sorter but my friends haven’t had the best praise for it.
3) LEGO dabblers, like our family, who have more LEGO than any human needs and therefore requires a logical and SIMPLE way to store all the pieces.
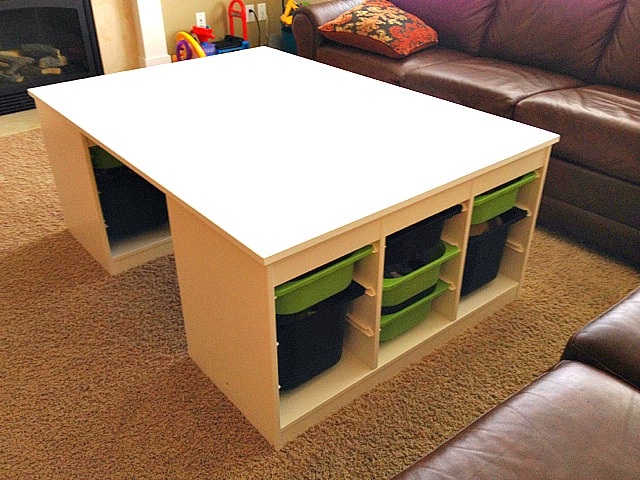
At the end of the day, we decided to create an IKEA-hack. We purchased two Trofast storage units. I selected the colour and size of the bins. My recommendation is to get a few more of the 1/2 size bins they are fantastic for LEGO.
Initially our plan had been to merely join the two storage units back to back. However, we watched the boys playing around the units and realized a space between them would be even better. Not only would they have a permanent fort to play in, they could access the bins from both sides.
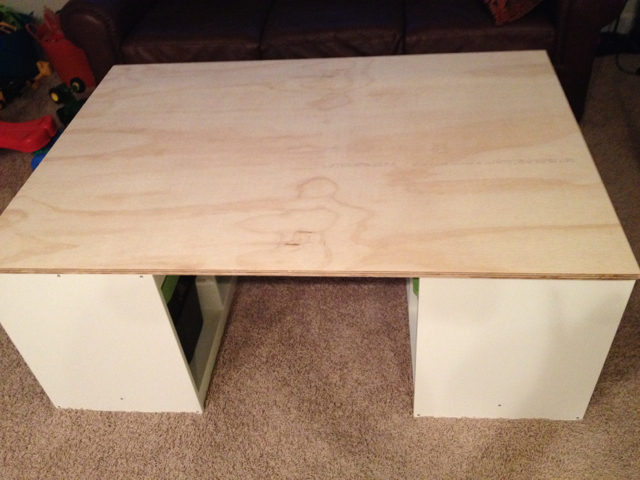
So, off to Home Depot for some plywood and paint. The entire table took less than 24 hours from conception to completion. The boys helped with everything from the purchasing to the assembly to the painting; they take a lot of pride in their new table. I derive a stupid amount of pleasure from the organized bins (8 on each side) full of LEGO and their wooden train tracks.
DIY Tips for How to Build a LEGO Storage Unit:
- assemble the bookshelves and decide on your preferred spacing BEFORE purchasing the plywood. The lovely folks at Home Depot will cut the wood to size, for you.
- sand the heck out of the plywood. No one wants to be digging slivers out of their child’s fingers.
- we used a bath & shower paint. My husband painted, sanded, and painted again. I’m also pretty sure he waved a magic wand because 3 years later (2017) we still haven’t had to re-paint the top.
- glue and screw the plywood to the table. Add the thickness of the plywood to the thickness of the top of the TROFAST bookshelf. Subtract 1/4″ from the total and that’s the length of screws you want. We screwed on the plywood from the inside of the bookshelves. No screw holes on the top!


